Can O Worms: Why I Love My Compost Maker
I want to tell you about my worms, yes, that’s right, my worms. What can I say, I love my worms! I bet you have never had anyone tell you that before, have you!? Ok, what exactly are you talking about you might ask? I am talking about my own little organic kitchen composting project where thousands of little worms make homemade compost that I get to spread all over my garden. I can see my Can O Worms from the sink when I am washing the dishes, and what can I say, I just love it. My wriggly little compost makers, that live in my Can O Worms wormery and make me wonderful rich homemade compost day in and day out.
How my love of homemade compost started
Ok, let me start at the beginning. I am a gardener, an avid gardener actually. I don’t claim to know a lot of technical things about gardening, but I love what gardening does for my soul, and I love how my plants respond to my intuitive, and rather untechnical approach. I live in a very sandy area, that is very close to the beach, and the soil in my garden is completely useless. Every plant that I put in the ground needs some serious attention to get going, and that does not mean just watering and making sure my Rottweiler Bruce does not stand on them. Although that also takes some doing, no mistake, Bruce is very interested in gardening, or maybe the term should be ungardening!

Bruce the ungardener
No, what it means is that every time before I plant a new bed or a section, all the soil, ok should I rather say, all the sand, needs to be removed and the bed is prepared with a rich preparation of compost, with a little sand mixed in, not just neat compost, followed by as much top soil as I can afford that month! Also mixed in with some sand to top up. I then leave the bed for about 2 weeks or so, and it is then just about ready to plant. Of course it depends on what you are going to plant, as to how long you should leave the bed, as some plants are more resistant than others to the strength of the compost. A lot of people might leave the bed for shorter, but it really depends on your situation. When the time comes I then plant the planned plants in their new bed, with of course the pre mandatory soak for the hole I have dug for each one. Once the soak is done, I then put in the chosen plant, sprinkle a good helping of worm castings from my wonderful compost maker, and close things up and follow off with a good tamp (or rather stamp) down and another soak. The final soak is important, as it does two things, ensure the earth is nicely saturated for the new arrival, and secondly, it allows the earth to be all smooshy, so you can do a second tamping, so important that second tamping, as it makes sure if there were any gaps or air pockets left between the soil and the roots, that they are removed. So, there we have it all ready to go! So, I have just told you all that, and I was going to tell you about worms, well, the magic ingredient I believe, that seems to keep all my plants growing really healthily in very trying conditions is the continual addition of super rich worm castings, that is the homemade compost that I get so excited about. About 2 years ago, I splashed out and bought a Can O Worms. I had been wanting one for ages, but just could never really justify the expense. So when I had finally scraped together the funds, I was very excited to start worming (not sure what the exact verb is to manage a wormery).
My chosen model, the Can O Worms arrived along with the starter pack of 1000 wriggly worms, I was so excited! I have to say that I cannot remember exactly what type of worms that I got, just what was recommended by the retailer, but they were probably a mix of Eisenia fetida and Eisenia andrei (I looked that up!) more commonly known as redworm, brandling worm, tiger worm and red wiggler worm, red californian earth worm. Just so you know!
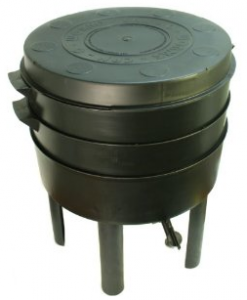
Setting up your Can O Worms
When you first get your Can O Worms, or another wormery if that is what you choose, then you will be faced with the slightly daunting task of settling the little guys in. I thought the easiest way to show you was a video (see below), this one is really good and clear and it explains all the basics and what you will need, I have listed it here for your convenience.
- Wormery of choice
- Worms (I recommend at least 1000, but 2000 if you can afford it)
- Coconut coir
- Newspapers
- A bucket of water
The little guys tend to be all over the place at first and keep wanting to climb out. Don’t worry, you will probably have a few fatalities, but they will settle down to their new job as your compost makers after a while, they just need a chance to get used to their new environment.
Getting started with your compost maker
- Things are not going to happen overnight, it takes a long time for worm poo to add up to much, just be patient. It probably takes a few weeks to eat a handful of kitchen waste. However, the flip side of this is that most of the waste produced by your little compost makers is liquid which is commonly known as worm tea, so you will be able to feed your precious plants with this liquid gold to keep them looking great. The worm tea can be diluted as much as one in ten, so remember to ensure you make best use of the liquid produced.
- Don’t feed your little organic composters (i.e. the worms) any meat or dairy products, strictly vegans they are!
- Don’t put too much acidic stuff into your Can O Worms, the PH of the environment gets messed up. If this does happen, sprinkle a little bit of garden lime (about a handful) into the wormery every couple of weeks.
- Kitchen waste that is really tough like onion skin and cabbage stalks are not going to be number 1 on your guys choice of menu, so try avoid those.
- It is possible, or even probable that the worms (I was also disappointed initially) are probably not going to be able to eat all your kitchen debris, don’t despair, there are a few things about this. Remember that the worms breed quite fast, and I personally started off with 1000, they say minimum is 500, if I were to start again, I would buy 2000, it just gets you off to such a better beginning.
So there we go, a brief history of worms! If you are on the fence about whether you want to get a worm filled compost maker, then I hope the love I feel for my worms shines through and helps you make up your mind. Don’t be mistaken, these little guys do take a little bit of work, but for me the whole process of having the worms and seeing my kitchen waste turned into superbly rich compost by my magical compost makers gives me a very warm fuzzy feeling when I see them worming away in their snug Can O Worms. Oh yes, and did I mention the Can O Worms is made out of recycled everything, which always makes me feel virtuous when I buy a recycled product, as if
I
actually did something! P.S If you are looking for a Can O Worms at a good price
*, I have always found Amazon generally beats everyone price wise, they also stock the coconut coir if you need it.
*Please note the link above directs to amazon as I have found they offer great deals on worm composters.
Posts related to Can O Worms: Why I Love My Compost Maker

I just opened my Can-O-Worms, and I have some funny looking bugs in there, what should I do? Don't panic, this is quite normal, and until you get your worm environment completely sorted out, you ...

There are lots of different options available if you are wanting to make homemade compost. Let's have a quick look at what compost maker system would suit you best. If you need more information, I ...

A few months back my son started a project in his environmental science class which involved the kids making a worm composting bin. I have to say it wasn’t something I had tried myself before ...

Helping my son with his school science project really opened up a whole can of worms for me. Literally! He had to build a worm composter and the subject quickly became one of complete fascination ...

One of the special features of the Envirocycle composter that I reviewed earlier is its ‘compost tea’ collector. Being a complete newbie to composting back when I bought it my first reaction to this was: ...


